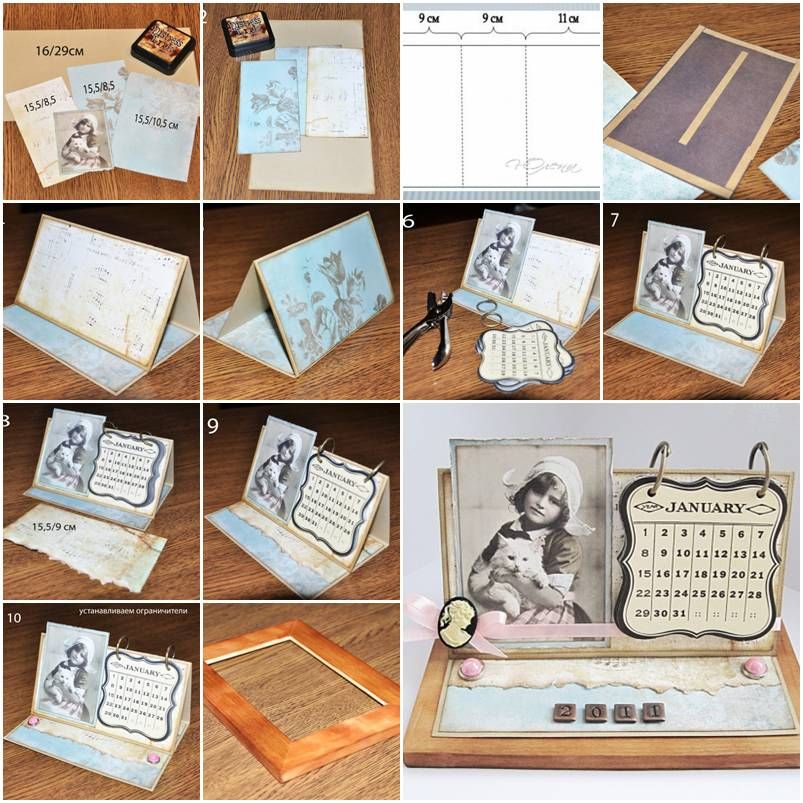
How to Create Your Own Scrapbook Calendar

 Have you bought your calendar for the New Year yet? Are you tired of the same old themes year after year? Wouldn’t it be great to have a calendar that has your own personal touch? A scrapbook calendar lets you create your own keepsake of special days and memories. It’s so fun and easy! Here’s what you need to do:
-
- Make a list of the basic supplies you will need.
- Scrapbook calendar : sizes 12″x12″, 81/2 “x11″
or 6″x6” desk top calendar. - Crafting scissors such as the black and yellow
scissors from EK Success. - Glue or double sided tape. Be sure they are acid free.
- Scrapbook paper. Available in a wide selection
of colors and designs. - Cardstock. This type paper tends to be thicker. It is also
available in many colors but usually without the designs. - Photos of family and friends.
- Paper Trimmer : such as Fiskars Euro Personal Trimmer.
- Stencils )(optional
- Stickers and/or other embellishments
- The most important supply you will need is
your imagination! Have fun making your calendar ! - Purchase Your Supplies. There are several stores that
carry scrapbook supplies. Most retail stores also carry
scrapbook supplies.
Here are a few you will probably recognize:
- Wal-Mart
- Target
- Michael’s
- Archivers
- Your local arts and craft store
Archivers and Michaels usually have a wider selection of items to choose from. Their sales people are generally more knowledgeable about scrapbooking.
In-home parties are another way to acquire the supplies you need. You can host a show in your home and earn free products. Invite some friends over and have a “Girls Night Out“! Two of the more familiar companies are Stampin’ Up and Close To My Heart. You can find out more about these companies by going online and accessing their websites. You can also use the website to locate a demonstrator in your area. The websites are www.stampinup.com and www.closetomyheart.com. I have two friends who are demonstrators for these companies. One is a demonstrator for Stampin’ Up and the other is a demonstrator for Close To My Heart. Both of these companies have a great selection of stamps, scrapbook paper, tools and many other great items. Another helpful website is www.splitcoaststampers.com . On this site you can find great ideas for projects you can create. There are tutorials for certain project ideas.
3.Selecting photos for your calendar. The pictures you choose for your calendar is totally up to you. You can create a different them for each month if you choose. For example the month of February can have a Valentine theme or for April you could do an Easter or Spring theme. It’s totally up to you. For my February page I traced around my photos using a heart stencil. Next, I glued the photos to a piece of pink cardstock and trimmed around the heart shape again but this time I trimmed at least ¼” from the edge of the photo. This will make a border around the edge of your photo and help it stand out more. Some other themes you could try are shamrocks for March, flowers for May, Red, White and Blue for July or Halloween for October. The possibilities are endless.
- When the year is over you can remove the pages of your calendar and place them in a scrapbook album so you can preserve your precious memories.
- Scrapbook calendars make great gifts. Let the kids help create a calendar as a special gift for their Grandparents. Be sure to supervise the children. An adult should be the one to use any scissors, paper trimmers and other sharp tools.
Now you are ready to start scrappin’ and have some fun!